 Caroline Arbor
You will master the physical and thermal treatments required to break seed dormancy in difficult perennials and woody fruit varieties. You will confidently awaken seeds that otherwise refuse to germinate under ordinary indoor conditions.
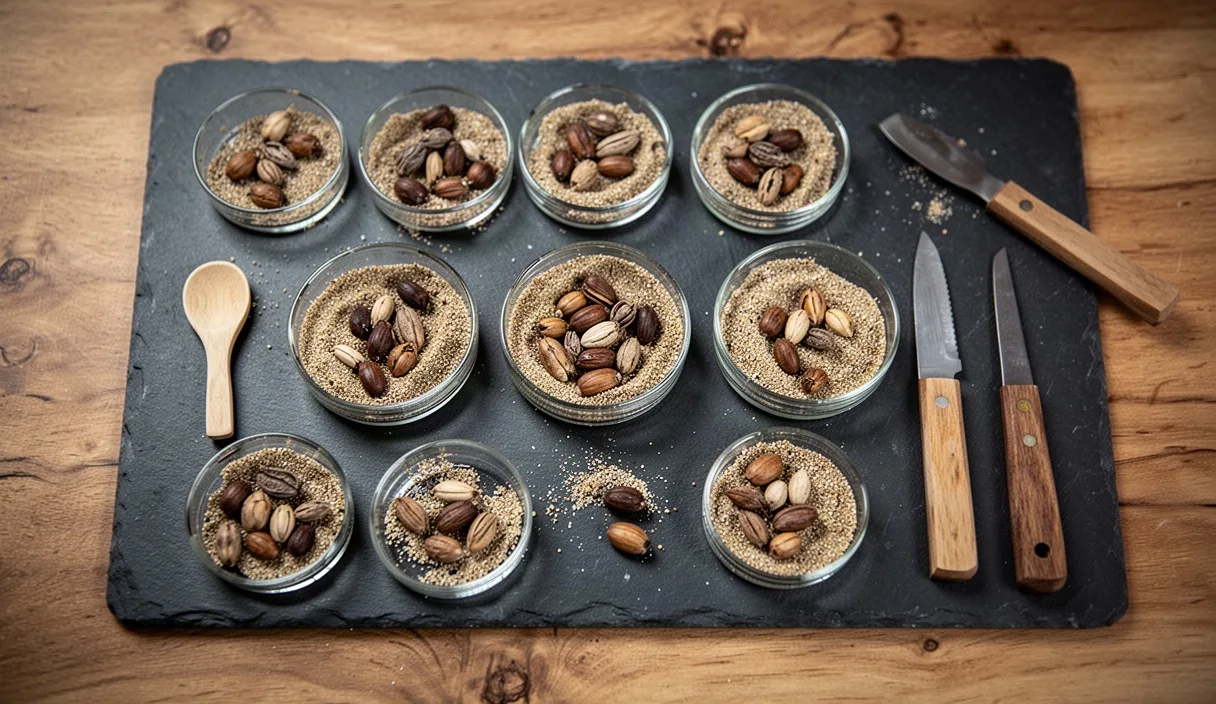
- Mechanical scarification gently thins impervious seed coats without injuring the embryo inside.
- Chilled damp sand provides the steady moisture necessary for uniform cold stratification.
- Weekly inspections ensure emerging radicles are potted promptly before mold can develop.
The cultivation of wild species, hardy perennials, and native shrubs frequently presents an initial obstacle that garden hybrids have long shed: the mechanism of dormancy. In temperate climates, seeds rarely fall to the earth ready to produce leaves at the first warm afternoon. Instead, biochemical inhibitors and hard protective coats preserve the embryo until specific environmental conditions indicate that winter has passed and spring is genuinely at hand. For the propagator, bypassing or satisfying these requirements is a fundamental skill that transforms seemingly recalcitrant seeds into vigorous crops.
Two primary practices govern the release of this dormancy: scarification, which breaks or softens an impervious outer testa, and cold stratification, which simulates the damp, chilled duration of a northern winter. When practiced with precision, these treatments allow the grower to coordinate germination on a chosen schedule rather than leaving emergence to the vagaries of outdoor winter weathering. The following guide details the tools, substrates, and cultural milestones necessary to guide dormant seeds through these preparatory regimes safely.
Understanding Botanical Dormancy in Temperate Seeds
Botanical dormancy is categorized broadly into physical dormancy, physiological dormancy, or a combination termed morphophysiological dormancy. Physical dormancy occurs when the outer seed coat is impervious to water and atmospheric gases. Species within the Fabaceae family, such as redbud (Cercis canadensis) and wild false indigo (Baptisia australis), possess cellular layers packed with suberin and cutin that maintain internal dehydration indefinitely until mechanically abraded, exposed to digestive acids within birds, or weathered by microbial activity.
Physiological dormancy resides deeper within the seed tissues, governed by an internal balance of growth regulators, chiefly abscisic acid, which suppresses germination, and gibberellic acid, which stimulates cellular expansion. Seeds of coneflowers (Echinacea purpurea), milkweeds (Asclepias syriaca), and sweet cicely (Myrrhis odorata) absorb water readily but cannot transcribe proteins for growth until sustained low temperatures metabolize the abscisic acid. In general, these seeds require exposure to temperatures between 34 and 41 degrees Fahrenheit (1 to 5 degrees Celsius) for durations ranging from twenty-one to ninety days.
| Botanical Family / Species | Dormancy Type | Primary Requirement | Approximate Duration |
|---|---|---|---|
| Lupinus perennis (Wild Lupine) | Physical | Physical Scarification | Instantaneous plus 12-hour soak |
| Asclepias incarnata (Swamp Milkweed) | Physiological | Cold Moist Stratification | 30 days at 36 to 40 degrees F |
| Cercis canadensis (Eastern Redbud) | Physical and Physiological | Hot Water Scarification then Chilled Storage | Water treatment plus 60 days cold |
| Aconitum napellus (Monkshood) | Morphophysiological | Extended Cold Stratification | 60 to 90 days at 34 to 38 degrees F |
When seeds exhibit both physical and physiological dormancy, treatments must proceed in an exacting sequence. Scarification must always precede cold stratification. If an impervious seed coat remains intact, water cannot penetrate the interior endosperm or embryo, rendering any subsequent chilling completely ineffective. The tissue must be hydrated for the cold temperature to catalyze the chemical breakdown of dormancy-inducing compounds.
Tools and Methods for Safe Physical Abrasion
Mechanical scarification requires sufficient disruption of the hard seed coat to permit water imbibition without crushing the delicate embryo located directly beneath. Propagators employ several simple implements, including medium-grit emery cloth, small triangular metal files, nail clippers, or sandpaper-lined containers. For large batches of robust seed such as sweet peas or wild senna, lining the interior of a glass jar with 150-grit sandpaper and agitating the seeds vigorously for two minutes provides uniform abrasion without direct handling.
For larger single seeds, manual abrasion with a mill bastard file or an emery board offers precise control. The operator holds the seed firmly between thumb and forefinger, directing the file against the shoulder or outer edge of the seed coat, carefully avoiding the hilum (the seed scar where it attached to the fruit) and the micropyle, where the radicle will emerge. The abrasion is finished the moment a slight change in coloration is observed, typically shifting from a dark, waxy exterior to a paler internal layer. Piercing or cutting too deeply invites pathogenic fungal entry and destroys the embryonic root.
Hot water immersion provides an alternative method for seeds with hard coats that are too small or irregular for mechanical filing. The following protocol outlines the proper execution of this treatment:
- Bring water to a full boil in a kettle, then remove it from the heat source and allow it to sit for forty-five seconds so the temperature declines to approximately 190 to 200 degrees Fahrenheit.
- Place the seeds into a heat-tolerant glass or ceramic vessel, allowing ample room for volume expansion.
- Pour the hot water over the seeds at a ratio of roughly four parts liquid to one part seed volume.
- Allow the seeds to stand in the cooling water for twelve to twenty-four hours at ambient room temperature.
- Inspect the seeds: those that have absorbed moisture will appear visibly swollen, often double their previous girth. Collect the swollen specimens for immediate planting or stratification.
- Repeat the warm water soak for any seeds that remain hard and unswollen, or lightly nick them with an emery board before introducing them to fresh water.
Acid scarification, utilizing concentrated sulfuric acid, is sometimes documented in forestry manuals for mass treatment of woody legumes. Owing to the significant chemical hazards, caustic vapor production, and disposal requirements, private cultivators should avoid concentrated acids entirely; mechanical and thermal approaches produce reliable outcomes with none of the accompanying safety risks.
Preparing Damp Media for Chilled Storage
Cold stratification requires moisture, oxygen, and cold. Storing dry packets of seed in a refrigerator achieves only dry preservation; it does not meet the criteria of stratification, because biochemical mobilization of nutrients requires cellular hydration. Propagators select from three primary media: coarse vermiculite, clean horticultural silica sand, or unbleached paper towels. Coarse vermiculite is particularly advantageous because it retains both capillary water and atmospheric oxygen around the seed coat while discouraging bacterial proliferation.
Moisture regulation represents the most critical parameter during medium preparation. The chosen material must be evenly moist, never saturated. A reliable assessment is the squeeze test: when a handful of damp vermiculite or peat is pressed firmly into a fist, no water should drip between the fingers, yet upon opening the palm, the medium should retain its consolidated shape without crumbling immediately. Excess water drives out ambient oxygen, leading directly to anaerobic fermentation, fungal rot, and seed asphyxiation.
Polyethylene bags of medium thickness (such as standard zip-closure household storage bags) serve as suitable stratification containers. They retain humidity while permitting gas exchange across the plastic boundary. When preparing the bag, mix the seeds into the damp substrate at a ratio of approximately one part seed to three parts medium. Distribute the seeds evenly throughout the matrix to prevent individual seeds from resting against one another, which can cause localized mold outbreaks to spread unchecked through the batch.
Before sealing, label the packet with the botanical name, the date the treatment began, and the anticipated completion date calculated from the specific requirements of the taxon. Press the bag lightly to expel excess air, leaving sufficient volume to allow air circulation, and seal it completely. Position the bags inside a refrigerator dedicated to horticultural purposes, or place them inside a crisper drawer away from ethylene-emitting culinary fruits such as ripening apples or tomatoes.
Monitoring Moisture Levels and Germination Milestones
The stratification environment requires routine inspection throughout the chilling window. Propagators should inspect their seed bags every seven to ten days. During this check, the grower assesses two primary factors: moisture retention and early embryonic emergence. If condensation ceases to appear on the interior lining of the plastic bag, the medium is drying out. Apply a fine mist of clean, room-temperature water to the substrate using a hand atomizer, reseal the container, and return it to the cold chamber.
Should any trace of grayish or white mold develop on the substrate or seed coat, prompt remediation is necessary. Remove the affected seeds immediately. Gently rinse the remaining healthy seeds in a dilute solution of three percent hydrogen peroxide mixed with nine parts clean water, allow them to air-dry for ten minutes on clean paper, and repackage them within freshly sterilized, lightly moistened vermiculite in a new container.
Premature germination frequently occurs toward the conclusion of a stratification cycle, particularly among cold-adapted native species such as columbine (Aquilegia canadensis) and cardinal flower (Lobelia cardinalis). If pale white radicles begin protruding from the seed coats while the packet remains in the refrigerator, the biochemical suppression has ended, and cold-temperature cell division has commenced. When more than five or six seeds in a packet show radicle emergence, the cold period must be concluded immediately, regardless of whether the original calendar target was reached. Delaying extraction causes the nascent roots to curl and intertwine, making separation without breakage nearly impossible.
Transplanting Newly Awakened Seeds into Starter Soil
The extraction of stratified seeds demands an extremely delicate touch. At this juncture, the embryonic root, the radicle, is crisp, turgid, and susceptible to mechanical shear. The propagator should empty the contents of the bag onto a wide, shallow tray lined with clean paper. If silica sand or fine vermiculite was utilized, seeds may be separated using wooden forceps or a dampened wooden toothpick, lifting each seedling by its seed coat rather than by the fragile newly emerged root tip.
Prepare seedling flats or small modules using a well-aerated, soilless growing medium consisting of fine peat or coconut coir, blended with fine perlite in an approximate ratio of three parts peat to one part perlite. Consolidate the soil lightly into the cells, avoiding heavy packing, and pre-moisten the flat with warm water until moisture runs freely from the bottom drainage holes. Create a shallow indentation in each cell corresponding to the size of the seed, typically twice the seed diameter in depth.
- Orient the seed into the depression so the emergent radicle points downward or laterally; never force it upward.
- Cover the seed gently with a light sifting of fine vermiculite or screened seed-starting mix, pressing lightly to secure good capillary contact between soil and seed.
- For seeds requiring light for final germination, such as many species of Campanula or Nicotiana, do not bury them; press them onto the surface and top them with only a dusting of horticultural grade fine vermiculite to preserve humidity.
- Apply moisture from below by placing the flat into a shallow reservoir of water until the surface darkens, thereby preventing dislodgement from overhead watering.
- Place the completed flat under adjustable broad-spectrum grow lights set to operate for fourteen to sixteen hours daily, maintaining ambient room temperatures around 65 to 70 degrees Fahrenheit (18 to 21 degrees Celsius).
Monitor the flats daily as the cotyledons push through the soil surface. Maintain steady moisture levels without overwatering, which can lead to damping-off caused by soil-borne oomycetes such as Pythium species. Circulating gentle air currents across the soil trays with a small electric fan operated on its lowest setting helps harden the hypocotyls and substantially discourages fungal growth.
Common Mistakes in Breaking Dormancy
Propagators frequently encounter setbacks during dormancy-breaking treatments. Recognizing these common errors prevents significant losses of scarce or expensive propagation stock:
- Excessive media hydration: Preparing the stratification medium in a dripping wet state deprives the embryo of oxygen, leading to suffocation, fermentation, and rapid rot within two to three weeks.
- Uncontrolled freezer exposure: Placing hydrated seeds into sub-freezing temperatures (below 32 degrees Fahrenheit or 0 degrees Celsius) causes the expanded cellular water to crystallize, rupturing the cell membranes and killing the embryo. Stratification requires chilling, not deep freezing.
- Deep abrading of the hilum: Nicking seeds directly through the attachment point or the radicle pocket causes irreparable structural damage to the embryo, resulting in non-viable seed.
- Co-mingling with domestic fruit: Storing stratification envelopes in kitchen refrigerators alongside ripening apples, pears, or melons exposes seeds to ethylene gas, which can interfere with the intended hormonal transitions.
- Abrupt thermal shock upon transplanting: Moving newly germinated seeds immediately from 36-degree refrigeration into direct sunlight or under intense heat mats can induce secondary dormancy or thermal stress. Transition trays at mild, indirect room temperatures for forty-eight hours before introducing them to intense light.
Continuing Your Propagation Program
Establishing an orderly recording system is the logical next step for every serious propagator. Record keeping should capture the seed provenance, the date of initial scarification, the duration of cold stratification, and the exact proportion of seedlings that emerge successfully. Because environmental conditions and genetic traits vary between geographic populations of wild plants, your internal logs will quickly become more useful than broad references.
Begin by assembling the required physical supplies: fine-toothed hand files, horticultural grade vermiculite, fresh seed flats, and a dedicated laboratory or kitchen thermometer to confirm the true operating temperature of your refrigerator's crisper compartment. For rare, threatened, or legally protected native botanical material, consult regional botanical garden conservators or local university extension specialists prior to collection, ensuring proper stewardship and the preservation of native plant populations.
This material serves educational purposes only; consult a local certified extension specialist or soil testing laboratory for site-specific agricultural decisions. Disclaimer

Further Reading
-
 Seed Propagation and Seedlings 8 min read
Preventing Leggy Seedlings Under Artificial Light
You will understand the precise relationship between light intensity, ambient temperature, and stem elongation in young tomato and pepper starts. With these adjustments, your seedlings will develop dense nodes and sturdy main stalks before garden planting.
-
 Seed Propagation and Seedlings 10 min read
Choosing Starter Soil: Commercial Mixes Versus Home Blends
You will evaluate the drainage, porosity, and nutrient content of commercial seed media alongside custom blended substrates. You will be prepared to mix reliable potting soil that supports early root formation without pathogen pressure.