 Caroline Arbor
You will evaluate the drainage, porosity, and nutrient content of commercial seed media alongside custom blended substrates. You will be prepared to mix reliable potting soil that supports early root formation without pathogen pressure.
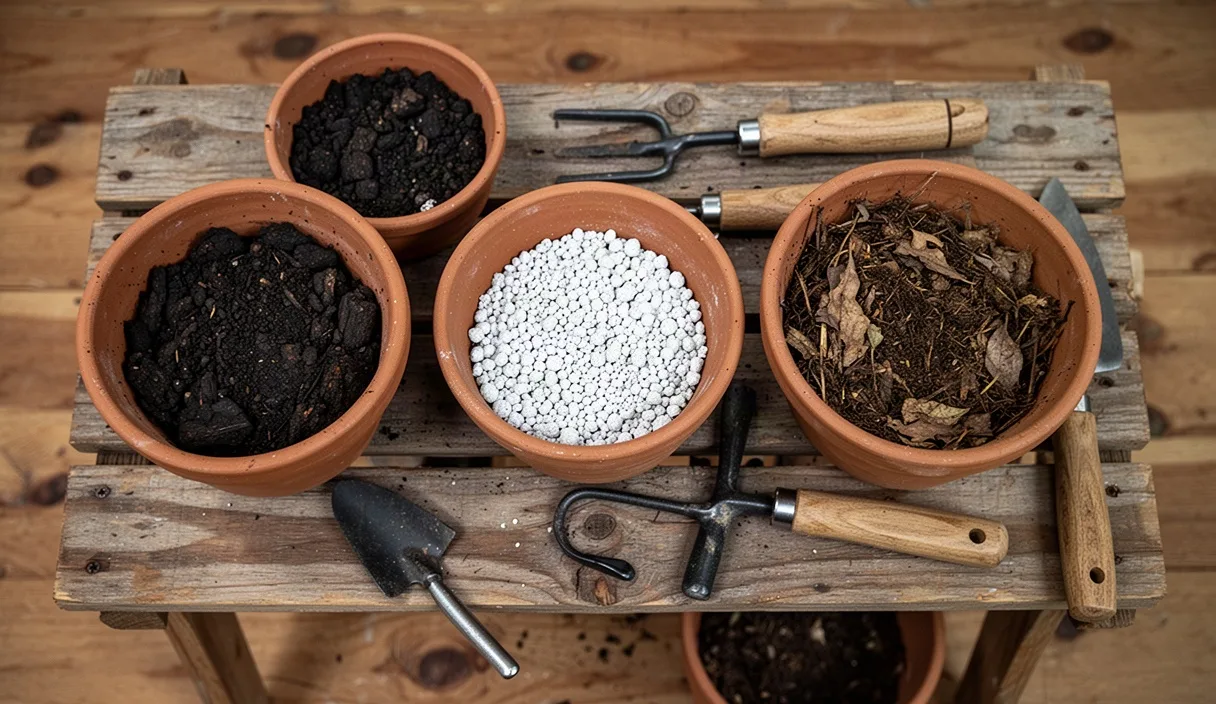
- Coir and peat provide water retention while perlite maintains necessary root oxygenation.
- True seedling substrates must remain low in soluble salts to protect delicate young roots.
- Home compost must be pasteurized if used in early indoor propagation containers.
The successful germination of horticultural seed depends to a remarkable degree upon the substrate selected for its earliest days. While an established plant can tolerate heavy loam and erratic hydration, an emerging radicle possesses limited energetic reserves. It requires immediate access to oxygen, a consistent film of moisture, and a physical matrix loose enough to permit rapid root penetration without mechanical impedance. Gardeners frequently find themselves choosing between manufactured proprietary blends and preparations compounded by hand in the potting shed.
Each method presents distinct advantages and specific management demands. Proprietary formulations provide uniformity and microbial suppression straight from the manufacturer, whereas customized nursery blends grant the grower sovereignty over ingredients, cost, and physical consistency. To select or construct the proper medium, one must understand how moisture tension, pore space, and mineral structure interact within the constrained environment of a nursery cell.
Core Physical Properties of Propagation Media
A seedling substrate performs three vital mechanical duties: it anchors the delicate plantlet, provides an exchange of atmospheric gases, and acts as a reservoir for water. In the field, soil relies upon natural capillary networks and deep drainage planes. In a shallow plug flat, however, the perched water table created by the bottom of the container imposes artificial constraints. Consequently, the medium must possess a total porosity substantially higher than ordinary garden topsoil.
Total porosity in a high-grade propagation medium should ideally occupy between 70 percent and 85 percent of the bulk volume. This space is divided into two distinct categories:
- Macropores (Aeration Pores): Large voids that drain freely under the influence of gravity. These voids allow carbon dioxide to escape from respiring roots while admitting fresh atmospheric oxygen. A deficiency in macroporosity leads directly to root asphyxiation.
- Micropores (Capillary Pores): Fine passages that retain water against the pull of gravity through surface tension. These spaces store the moisture that the young root hairs absorb as transpiration occurs.
The balance between these pore classifications determines hydraulic conductivity, which is the ease with which water moves through the matrix. If a substrate is composed of exceedingly fine particles, capillary action becomes excessive, the aeration pores collapse, and the medium remains saturated for prolonged periods. Conversely, if the particles are uniformly coarse, water cascades through the container without wetting the matrix, resulting in moisture stress for the germinating embryo.
Bulk density must also be measured with care. A dry bulk density between 0.15 and 0.35 grams per cubic centimeter prevents the seedling tray from becoming unwieldy while remaining substantial enough to prevent the young plant from dislodging during overhead misting. Substrates that fall below this density range may float or shift during watering, exposing fragile roots to desiccating air currents.
Evaluating Commercial Peat and Coir Formulations
Commercial seed-starting preparations are generally formulated without native mineral soil, utilizing instead a base of sphagnum peat moss or processed coconut coir pith. These components provide an inert, low-fertility bed that reduces the initial risk of fungal damping-off. However, their physical and chemical behaviors diverge under greenhouse conditions.
Sphagnum peat moss, harvested from decayed bog layers, offers excellent water retention and an acidic baseline with a pH typically between 3.5 and 4.5. Commercial blenders neutralize this acidity by incorporating pulverized calcitic or dolomitic limestone, bringing the final reaction to a stable range of 5.6 to 6.4. Peat particles contain substantial natural porosity, but when allowed to dry out entirely, they develop hydrophobic characteristics. Manufacturers routinely introduce chemical wetting agents to counteract this tendency, though such surfactants deteriorate over months of storage.
Coconut coir pith, derived from the mesocarp of the coconut husk, serves as an alternative to peat. Coir exhibits superior initial wettability, taking up water without the aid of chemical surfactants. It naturally maintains a pH between 5.8 and 6.8, requiring minimal lime adjustment. However, poorly processed coir may harbor elevated concentrations of sodium and chloride ions from coastal processing facilities. High-grade commercial coir must be thoroughly washed and buffered with calcium nitrate to displace excess potassium and salts that could scorch tender radicles.
| Property | Sphagnum Peat Formulation | Coconut Coir Formulation |
|---|---|---|
| Native Reaction (pH) | 3.5 to 4.5 (requires lime buffering) | 5.8 to 6.8 (generally stable) |
| Rewetting Capability | Low when dry; requires wetting agents | High; absorbs water readily without surfactants |
| Soluble Salt Risk | Negligible | Moderate to high if unwashed |
| Decomposition Rate | Slow to moderate | Extremely slow due to high lignin content |
| Cation Exchange Capacity | High (100 to 180 meq/100g) | Moderate (40 to 90 meq/100g) |
In addition to the primary carbonaceous base, commercial mixes incorporate horticultural perlite, vermiculite, or processed parboiled rice hulls. Perlite, a volcanic glass expanded through thermal treatment, introduces non-collapsible macropores. Vermiculite, a hydrated laminar mineral, expands into accordion-like platelets that hold both water and dissolved nutrients. When reading commercial packaging, ensure that the product is designated specifically for germination rather than potting-on; standard potting soils contain heavy fertilizers and coarse bark chunks that can smother tiny seeds.
Formulating a Balanced Three-Part Potting Blend
Growers wishing to prepare their own mixtures can produce a reliable, economical medium by combining a moisture-retentive base, an aeration amendment, and a mature biological component. A classic three-part formula balances physical structure with mild biological buffering, suitable for most vegetable, flower, and herb seeds.
The standard baseline mixture consists of equal volumes of the following materials:
- One part sifted sphagnum peat moss or well-rinsed coconut coir pith.
- One part horticultural-grade coarse perlite or clean, washed coarse sand.
- One part thoroughly decomposed, double-sifted leaf mold or thermal compost.
Preparation requires systematic physical reduction and measuring. The following sequence ensures a uniform texture free of dense clumps:
Screening the Base Materials: Pass the peat or coir through a hardware cloth screen with a 6-millimeter mesh. This removes coarse twigs, fibrous roots, and dense chunks that obstruct root descent. If using leaf mold or compost, pass it through the same screen to eliminate unrotted fragments and stones.
Neutralizing the Acid Fraction: If sphagnum peat forms the base, add ground agricultural limestone to counteract acidity. Incorporate approximately 30 grams of dolomitic limestone per 10 liters of dry peat. This addition provides essential calcium and magnesium while stabilizing the pH within the optimal zone of 6.0 to 6.5. Omit the limestone if coconut coir serves as the sole base material.
Hydrating and Blending: Place the screened components into a clean mixing vessel or onto a smooth tarp. Blend the dry materials thoroughly using a spade or flat rake until the distribution of perlite throughout the organic matter appears uniform. Gradually introduce warm water while turning the pile. The medium should reach a state where a handful squeezed firmly forms a loose ball that fractures easily when poked, releasing only a single drop of water between the fingers.
Curing the Compound: Allow the moistened mixture to rest under cover for 48 hours prior to filling trays. This rest period permits moisture to distribute evenly through the micro-capillaries of the peat and allows the limestone to initiate its buffering reaction with the organic acids.
Managing Pathogen Risks in Sifted Garden Soil
Incorporating true mineral soil or unpasteurized home compost into seedling media introduces beneficial biological diversity, but it also carries inherent hazards. Soil-borne oomycetes and fungi, such as Pythium ultimum, Rhizoctonia solani, and various Fusarium species, thrive in warm, humid seedbeds. These organisms attack the seedling at the soil line, causing the stem tissues to collapse in the condition known as damping-off.
Field soil also tends to compact catastrophically when placed in small containers. The natural structural aggregates of field earth collapse under repetitive surface watering, forming an impermeable crust that excludes oxygen. If garden loam is utilized, it must never exceed 20 percent of the total blend volume, and it must undergo screening to remove weed seed and root debris.
To eliminate lethal pathogens without destroying the soil chemistry, pasteurization provides a reliable thermal pathway. True sterilization, which involves heating soil beyond 100 degrees Celsius, is detrimental; it volatilizes organic matter, releases toxic concentrations of soluble manganese, and creates excessive ammonium nitrogen. Pasteurization, by contrast, targets pathogenic organisms while preserving heat-tolerant beneficial bacteria.
To pasteurize small batches of sifted garden soil or questionable compost:
- Moisten the sifted soil until it is damp but not saturated. Dry soil insulates pathogens against heat, while dripping-wet soil requires excessive energy to raise in temperature.
- Spread the soil in an oven-safe glass or metal tray to a depth not exceeding 8 centimeters.
- Cover the container tightly with aluminum foil to trap moisture and ensure that heat transfers via steam through the substrate pores.
- Insert a reliable metallic stem thermometer through the foil into the geometric center of the substrate layer.
- Place the tray into an oven preheated to 110 degrees Celsius. Monitor the core temperature closely until it reaches 75 to 80 degrees Celsius.
- Maintain the substrate temperature strictly between 75 and 80 degrees Celsius for 30 consecutive minutes. Do not permit the temperature to exceed 85 degrees Celsius.
- Remove the tray and allow it to cool to ambient room temperature before incorporating it into the final blend. Use the pasteurized material within several days to prevent re-colonization by stray airborne spores.
Testing Media Texture and Moisture Capacity at Home
Before entrusting valuable or scarce seed to an untested substrate, a grower should evaluate its physical mechanics using simple bench-top tests. These assessments reveal whether the medium will drain adequately under repeated irrigation or whether it risks drowning early root growth.
The first evaluation is the compaction and resilience test. Fill a standard four-cell nursery pack with the lightly moistened substrate, tapping the flat gently against the bench twice to settle the mix without pressing it down with the fingers. Pour clean water over the cells until it flows freely from the drainage holes, then allow the pack to drain for 15 minutes. Once the gravitational water has exited, compress the surface of one cell gently with your thumb to a depth of roughly 5 millimeters, then release.
A well-structured medium will spring back partially, displaying resilient elasticity. If the depression remains rigid and feels slick or mud-like, the proportion of silt, clay, or fine compost is excessive. If the substrate collapses into a muddy slurry that seals the drainage slits beneath the cell, the media will induce root rot during prolonged overcast periods.
The percolation rate may be assessed quantitatively using a clear 500-milliliter plastic container featuring four perforations drilled into the bottom base:
- Fill the cylinder to a measured line with dry substrate, then add water slowly until the column is thoroughly wetted and dripping ceases.
- Pour 100 milliliters of water rapidly onto the top surface of the settled media column.
- Time how many seconds elapse before the first drop exits the bottom drainage holes, and measure how long the medium takes to absorb the pooled surface liquid.
Under sound physical parameters, surface pooling should disappear within 15 to 30 seconds, and gravitational water should begin dripping from the base within 45 seconds. Drainage that requires longer than 90 seconds indicates inadequate macroporosity, demanding the addition of more coarse perlite, sharp grit, or pumice to open the internal structure.
Common Mistakes in Media Selection
Many propagation failures attributed to faulty seed or inadequate warmth stem instead from errors in media choice. Careful observation reveals several repetitive mistakes across home and semi-commercial operations:
- Applying Finished Potting Soil to Seed Flats: Commercial potting soils frequently contain coarse bark nuggets and prolonged-release synthetic fertilizer prills. These bark pieces present physical barriers to minute seeds, while the initial salt concentration can desiccate tiny root tips.
- Manual Over-Compaction: Growers often press substrate firmly into plug trays with their fingers before sowing. This practice crushes the macropores, increasing bulk density and inducing early root suffocation. Substrates should always be settled using light vibrations or gentle water settle-in.
- Over-Sterilization with High Heat: Subjecting home compost to excessive heat (exceeding 95 degrees Celsius) releases phytotoxic compounds, destroys soil structure, and produces an offensive odor. Strict adherence to moderate pasteurization thermal thresholds is necessary.
- Reusing Spent Seedling Medium: Using media from previous crops without thermal re-treatment invites damping-off pathogens, which accumulate in root remnants and remain dormant in old substrate pores.
Practical Next Steps for the Nursery Bench
To prepare your propagation space for the upcoming sowing cycle, begin by auditing your current components. If you elect to purchase commercial products, obtain fresh bags from reputable horticultural suppliers, verifying that the contents have been stored indoors away from rain and sunlight, which break down wetting agents and packaging integrity.
If you intend to mix your own formulations, assemble the requisite components now: source coarse horticultural perlite (grade 2 or 3), premium long-fiber sphagnum peat or triple-rinsed coconut coir, and clean leaf mold. Construct a simple wooden frame fitted with 6-millimeter hardware cloth to facilitate rapid sifting of your base materials.
Clean and sanitize all propagation flats, dibbers, and mixing troughs with a 10 percent dilution of household bleach or an approved horticultural sanitizer prior to handling clean media. Blend a single trial batch of substrate, run the percolation test detailed above, and verify that the water behaves as intended. If you harbor doubts regarding soil chemistry or persistent disease presence in your native amendments, consult an agricultural extension office or an accredited soil testing laboratory for a full mechanical and mineral appraisal.
This material serves educational purposes only; consult a local certified extension specialist or soil testing laboratory for site-specific agricultural decisions. Disclaimer

Further Reading
-
 Seed Propagation and Seedlings 8 min read
Preventing Leggy Seedlings Under Artificial Light
You will understand the precise relationship between light intensity, ambient temperature, and stem elongation in young tomato and pepper starts. With these adjustments, your seedlings will develop dense nodes and sturdy main stalks before garden planting.
-
 Seed Propagation and Seedlings 10 min read
A Guide to Seed Scarification and Cold Stratification
You will master the physical and thermal treatments required to break seed dormancy in difficult perennials and woody fruit varieties. You will confidently awaken seeds that otherwise refuse to germinate under ordinary indoor conditions.