 Caroline Arbor
You will incorporate autumn and spring cover crops to protect bare raised bed soil from erosion, compaction, and nutrient leaching. You will utilize green manures to fix atmospheric nitrogen and enrich bed tilth naturally.
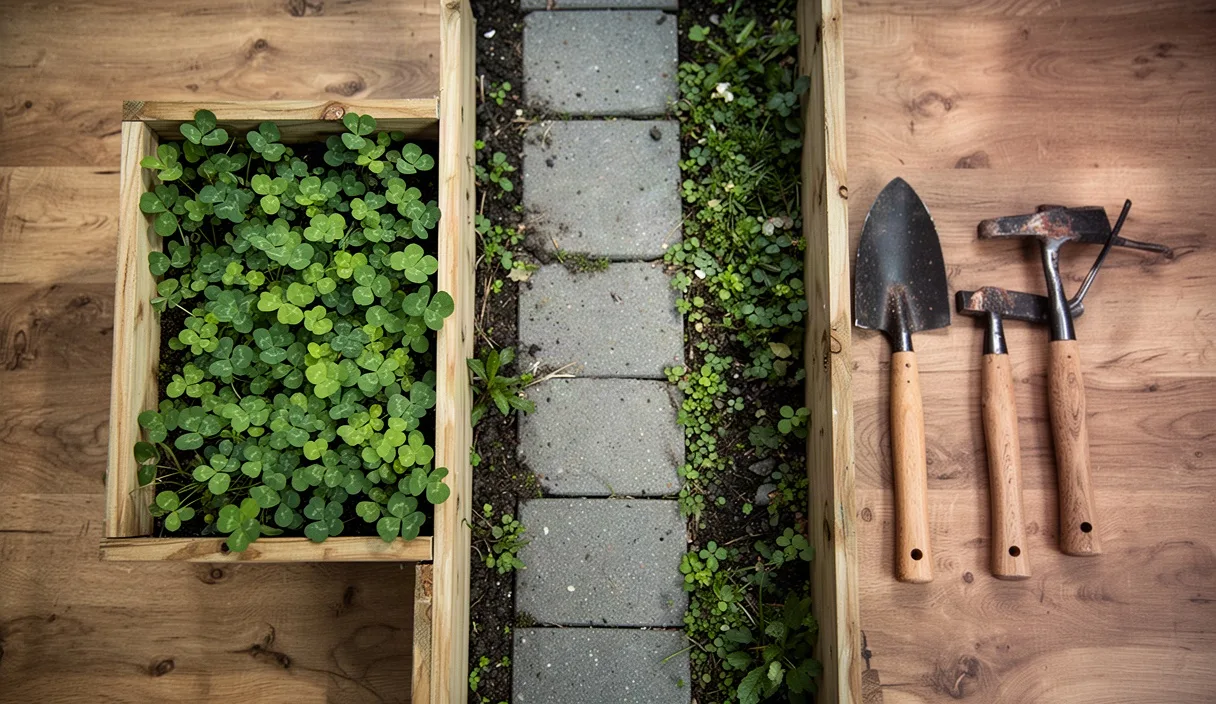
- Legume cover crops gather nitrogen from the air and store it in root nodules for following vegetables.
- Fibrous root systems of winter rye preserve structure and deter winter rain compaction.
- Terminating green manures two weeks before planting allows proper soil incorporation.
Raised garden beds present distinct advantages in drainage and soil warming, yet their elevated structure makes them particularly susceptible to nutrient depletion and structural weathering. When autumn arrives and summer crops are cleared, gardeners frequently leave the soil bare. Over the winter months, heavy rains leach soluble nitrates and minerals downward, while wind and freeze-thaw cycles degrade the delicate aggregate structure of the surface soil. Replenishing these beds each spring with bagged compost can become both expensive and labor-intensive, often failing to address the deeper biological life of the growing medium.
The practice of green manuring, adapted from field agriculture to the domestic scale, offers a measured solution to this seasonal decline. By sowing carefully chosen cover crops immediately following the late-season vegetable harvest, you introduce living roots that hold the soil in place, feed beneficial mycorrhizal fungi, and generate organic matter in situ. This guide sets forth the practical methods required to select, establish, and terminate cover crops within the spatial constraints of timber or masonry raised beds.
The Strategic Purpose of Green Manures in Small Beds
In an enclosed wooden or stone raised bed, the volume of soil is finite. Unlike field crops, which draw from a vast subsoil reservoir, the plants in a domestic bed rely entirely on the top twelve to twenty-four inches of medium. Heavy seasonal rain events displace essential cations such as potassium, magnesium, and calcium past the bottom of the frame. A deliberate cover crop functions as an active biological sponge, drawing these nutrients upward into its tissues and storing them securely against winter precipitation.
Furthermore, green manures prevent surface crusting and compaction. Unprotected soil particles detach under the kinetic force of falling raindrops, sealing the surface pores and impeding spring water infiltration. The canopy of a leafy cover crop absorbs this physical impact, allowing rainwater to seep gently down the stems to the root zone. Below ground, root channels establish permanent pathways for air and moisture, leaving behind a network of biopores when the plant tissue eventually breaks down.
From a biological perspective, an active root system is indispensable to microbial health. Soil microbes enter dormancy or diminish in population when root exudates cease. By sustaining living roots through the colder months, the gardener sustains the soil food web, which in turn accelerates nutrient cycling when spring planting begins. The introduction of organic residues also increases the cation exchange capacity of sandy or peat-heavy blends, ensuring that subsequent vegetable plantings perform reliably.
Selecting Legumes Versus Deep-Rooting Grasses
Selecting an appropriate species requires balancing the specific nutrient deficits of the bed against the physical effort required to terminate the stand in spring. Cover crops generally divide into two functional families: nitrogen-fixing legumes and biomass-producing grasses, each offering distinct agronomic benefits.
Legumes, such as crimson clover (Trifolium incarnatum), winter field peas (Pisum sativum subsp. arvense), and hairy vetch (Vicia villosa), enter into symbiosis with Rhizobium bacteria. These specialized microorganisms convert atmospheric nitrogen into plant-available ammonium. When these crops are cut down before they set seed, that accumulated nitrogen is released into the raised bed as the roots and foliage decay. Legume root systems tend to be moderately soft and break down readily, making them straightforward to manage with simple hand tools.
Grasses and cereals, such as winter rye (Secale cereale) and forage oats (Avena sativa), prioritize massive root expansion and carbonaceous biomass. Winter rye roots can extend several feet, fracturing dense layers of silt or clay and gathering residual nitrogen with remarkable speed. However, cereal rye produces thick, fibrous root clumps that can prove challenging to clear within the tight corners of a raised bed. Forage oats, by contrast, present a practical compromise for northern climates: they produce substantial biomass through the autumn, but consistently winterkill when temperatures fall below twenty degrees Fahrenheit, sparing the gardener the effort of mechanical spring termination.
| Species | Classification | Target Sowing Window | Primary Benefit | Ease of Termination |
|---|---|---|---|---|
| Forage Oats | Annual grass | Late summer to early autumn | Rapid canopy, winterkills naturally | Very simple |
| Crimson Clover | Annual legume | Late summer | Atmospheric nitrogen fixation | Moderate |
| Winter Field Pea | Annual legume | Early to mid-autumn | Nitrogen fixation, tender foliage | Simple |
| Winter Rye | Cereal grass | Early to late autumn | Maximum biomass, erosion control | Demanding |
| Daikon Radish | Brassica taproot | Late summer | Alleviates subsoil compaction | Simple (winterkills) |
For most domestic raised beds measuring four feet by eight feet, a combined sowing provides the most balanced result. Pairing a legume with a cereal grass, such as field peas with forage oats, ensures both nitrogen accumulation and adequate physical soil coverage. The oats climb upright, providing structural trellising for the climbing peas, while the resulting spring mulch provides both carbon and nitrogen in proportions that decompose smoothly.
Late Summer and Autumn Sowing Timetables
The successful establishment of a winter cover crop depends upon calendar precision. Sowing too late denies the seedlings sufficient warmth and sunlight to form a durable crown and root system before winter dormancy. Conversely, sowing too early may interfere with the final harvest of warm-season vegetables such as tomatoes and peppers.
For brassicas and tender annuals such as Daikon radish and crimson clover, seeding should occur six to eight weeks before the historical first autumn frost date. This window allows Daikon radish to form a substantial, deep taproot that penetrates compacted layers before freezing temperatures collapse the top foliage. In regions where the first hard frost occurs in mid-October, target the final week of August or the first days of September for sowing.
Hardy grains and legumes tolerate later timetables. Winter rye and hairy vetch can germinate in soil temperatures as low as forty degrees Fahrenheit and may be sown up to three weeks before the ground begins to freeze. To prepare the raised bed, follow this sequence:
- Clear spent vegetable stalks, leaving any deeply rooted material cut off at ground level to minimize disturbance to the soil architecture.
- Rake the surface smooth with a domestic hand rake, breaking up large dry clods until a fine seedbed of roughly one inch depth is achieved.
- Broadcast seed evenly by hand across the bed surface. Legumes typically require twelve to twenty seeds per square foot, whereas cereal grasses require approximately thirty seeds per square foot.
- Lightly tamp the seeds into the soil using the flat back of an iron rake or a small board to ensure firm seed-to-soil contact.
- Cover the seeds with a quarter-inch to a half-inch layer of mature sifted compost or aged leaf mold, and water the bed thoroughly with a gentle rose attachment.
Maintain consistent moisture until emergence, which typically occurs within four to seven days under seasonal autumn temperatures. If autumn rainfall is scarce, provide supplemental watering twice weekly until the stand reaches three inches in height.
Mechanical Termination Without Chemical Herbicides
Chemical herbicides have no place in a well-tended domestic kitchen garden. Because raised beds have defined perimeters, terminating cover crops by mechanical means is entirely achievable using everyday garden implements. The ideal moment for termination occurs when the plants reach the early bloom stage, roughly when twenty to thirty percent of the legume blossoms have opened. At this juncture, the plant contains its maximum reserves of nitrogen, and the stems remain succulent enough to decay quickly without immobilizing soil nutrients.
Three mechanical approaches work particularly well within an enclosed bed:
The Hand-Shear or Scythe Cut. Using hedge shears, grass shears, or a compact hand sickle, slice the stems of the cover crop flush with the soil line, or just beneath the soil crown. It is essential not to pull the roots from the soil, as those subterranean tissues hold valuable nitrogen nodules and create beneficial root channels as they break down. Lay the cut green biomass evenly over the bed surface as a protective thatch.
Occultation via Silage Tarp. For persistent perennial-type covers or vigorous winter rye that threatens to regrow from its root base, tarping provides a dependable solution. After shearing the tops, cover the raised bed with an opaque, ultraviolet-stabilized black polyethylene sheet or heavy landscape fabric. Weigh the edges down firmly with bricks, stones, or wooden battens to seal out all sunlight. Deprived of light and subjected to moderate ambient warmth, the remaining root systems perish within three to four weeks, while worms and microfauna migrate upward to consume the residues.
Natural Winterkill. Gardeners who prefer minimal intervention can rely on cold-sensitive species like oats and Daikon radish. When sustained winter temperatures fall below twenty degrees Fahrenheit, the plant cells burst, and the vegetative canopy collapses onto the soil. By spring, this biomass has partially decomposed into a thin, brittle parchment that can be pushed aside effortlessly at planting time.
Integrating Decomposing Biomass into Soil Before Planting
Once terminated, the organic residue must be managed carefully so it does not interfere with spring sowing. Inexperienced gardeners frequently make the error of immediately digging fresh, fibrous green residue deep into the soil. When large volumes of raw organic material are buried in oxygen-poor lower layers, anaerobic conditions can develop, producing organic acids that inhibit the germination of subsequent vegetable seeds.
The preferred method involves shallow surface integration or surface mulching. If you practice reduced tillage, leave the terminated residue directly on the soil surface to serve as a weed-suppressing mulch. When the time comes to set out warm-season transplants such as eggplants or brassicas, simply part the residue with a trowel, dig a planting hole, and seat the transplant directly into the unworked bed.
If you intend to direct-sow small, delicate seeds such as carrots, onions, or lettuce, a clear seedbed is necessary. In this scenario, allow the sheared green biomass to wilt on the surface for seven to ten days. As the moisture evaporates, the material softens. Next, use a domestic hand fork to incorporate the withered foliage into only the top two to three inches of soil. This shallow zone contains abundant oxygen and active aerobic bacteria, which rapidly break down the soft tissue.
Allow a buffer period of two to three weeks between incorporating green manure and direct-sowing vegetable seeds. During this breakdown phase, soil bacteria consume available soil nitrogen to fuel the decomposition process, an effect known as temporary nitrogen immobilization. Once the material is fully processed by the soil biology, that nitrogen is released back into the soil solution, ready for uptake by the new crop.
Common Mistakes to Avoid
Even conscientious gardeners encounter occasional setbacks when introducing cover crops to confined spaces. Bearing the following cautions in mind will preserve both the health of the soil and the gardener's time:
- Permitting the cover crop to set viable seed. If hairy vetch, crimson clover, or winter rye matures to the point of seed formation, the cover crop ceases to be an asset and becomes a persistent weed within the raised bed for several seasons to come. Always terminate the crop while it is in active bloom.
- Selecting aggressive cereal rye in deep wooden frames without a termination plan. Winter rye forms a dense root mass that can be difficult to slice with hand tools. Gardeners who lack occultation tarps or heavy-duty edging tools are often better served by oats or field peas.
- Sowing into bone-dry autumn soil without irrigation. Broadcasting seeds onto parched compost invites birds and rodents to consume the seed before germination can take place. Soil must be moist at sowing and maintained until establishment.
- Trenching green biomass deeply into cold spring soil. Deep burial stalls decomposition and creates sour pockets of organic matter. Keep residues on the surface or confined to the uppermost two to three inches.
Practical Next Steps for the Raised Bed
To begin integrating cover crops into your seasonal rotation, measure the square footage of your raised beds and consult your local frost records. If you reside in an area subject to freezing winters, obtain a small supply of forage oats and winter field peas from an agricultural seed supplier or reputable domestic nursery. If you are uncertain about your bed's underlying fertility, a standard soil test performed by an extension service office will clarify whether lime, phosphorus, or potassium adjustments should accompany your green manure planting.
Begin by setting aside a single raised bed this autumn for your initial trial. Sow the oats and peas thickly in late August or early September, observe their growth into the late season, and evaluate the improved moisture retention and crumbly tilth of the soil when spring planting returns. Through this steady, seasonal stewardship, you will sustain the structural integrity and productive capacity of your garden beds for years to come.
This material serves educational purposes only; consult a local certified extension specialist or soil testing laboratory for site-specific agricultural decisions. Disclaimer

Further Reading
-
 Soil Management and Composting 9 min read
Building and Maintaining an Active Garden Compost Heap
You will balance carbon and nitrogen inputs to manage a tidy, productive compost pile that breaks down kitchen and garden trimmings cleanly. You will generate sweet-smelling, nutrient-dense humus for your beds within a single growing season.
-
 Soil Management and Composting 10 min read
Interpreting Laboratory Soil Reports for Kitchen Gardens
You will read soil test parameters including pH, cation exchange capacity, and primary macronutrients without confusion. You will apply only the specific organic amendments your plot requires, avoiding harmful fertilizer excesses.